Thursday, October 25, 2012

Jean Purse


Couldn't let the jeans just sit there, after shortening jeans into shorts/bermudas.  With the church bazaar around the corner, thought of some little purses.  I still have some jean left over and planning something with those in the near future. 
 

Directions:  1.  From bottom of jean measure 8" and cut. 
                  2.  Lay cuff over scrap fabric folded in half.  Cutting on fold; cut 1/4 larger
                       than jean (this is to give fabric for seam allowance.  The bottom of your 
                       fabric is the folded end. 
                
 
3.  Stitch sides of lining using 1/4" seam allowances.

4. Cut 1" square out of bottom as shown below out of lining and jeans. This will form a
    base for the purse.


5.  Fold cut edge together shown in below picture and stitch using 1/4" seam allowance. 
     Do same for lining.
6.  Right side jean and insert liner so wrong sides are together.

 
7. Cut two 2 3/4" X 13" of scrap fabric.  Sew along long side with right sides together. 
    Inside right.  These will be the handles.
8.  Place handles and tack into place.
9.  Make sure liner is snug to bottom of purse.  With raw edges of liner carefully fold them
     and stitch into place.
10. Embelish as desire.
 
This makes cute little bags with free items around the house.  The button flower was a piece of fabric sewn like the handles, however bunching the fabric and secured with a button. 
 
Enjoy and keep sewing. 

Tuesday, October 23, 2012

Jeans Get New Life


This is such a simple technique.  As you can see my the picture, my daughter has plenty of room in the waist.  You just have to love elastic and button waists.  Wish we would have had this when I was a kid.  To find waist and length to actually fit can be so difficult and trying of ones patience. 
 
1.  Had daughter try on her pants so she could tell me how long her shorts should be.  Then I snipped a little so I could do the actually cutting on my cutting mat.
2.  After cutting, run a zigzag stitch at the bottom edge.  (If I owned a serger, this would be a great place to use it.)
3.  Cuff the end to finish.  Iron with some spray starch.  Tack into place.
 
She is thrilled to have a few new shorts and it didn't cost me anything.  Altered these in less than 10 minutes.  This time she wanted the hem cuffed.  I've done this in the past with a ribbon trim and it looks adorable.  In fact, we saw a pair of bermuda shorts just like them with the ribbon trim for $40 in a store window.  My daughter was impressed; knowing we spent $2.75 on 2" wide ribbon.


Wednesday, October 17, 2012

Table Topper


Thought I had used up all my blue scraps, but apparently they breed.  Found more as I looked for scraps for sewing items for our church bazaar.   I have never sewn triangles before, so thought this would be fun to try and another way to use up scraps.  Don't look to close, my points aren't great, but not bad for the first attempt. 
 
This table topper measures 22" finished.
 
First cut strips of fabric 3" lengths.  Then using a ruler or make your own template and make triangles. You will need 24 light colored triangles and 72 dark colored triangles (or if you choose just cut total of 96 triangles and arrange any way you prefer). 


Cut 2.25" strip of fabric approx 90" long to form bias edge.  Fold and press bias strip in half.  Attach when ready to finish edge of topper.

Ok, wasn't thinking when I started sewing to take a picture before piecing it all together, but then I didn't have a pattern and just started sewing triangles.


Think of the triangles as a slice of pizza.  Center has 6 individual triangles, but you first lay 1 down.  Sew a row of 3 triangles, row of 5 triangles and  a row of 7 triangles together.   Now sew your "slice" matching seams.  You will make 6 "slices".  Take 3 of the "slices" and matching seam sew them together.  You will end up with 2 sections.  Again matching seams, sew the 2 sections together to form a hexagon. 

Layer 3/4 yard fabric for backing, batting, and top.  Hold all layers in place with safety pins. 
You can get as fancy with your stitching as you would like, however, I can barely quilt so I stitch in the ditch.  You can stitch the top any way you choose.  Be creative start in in the center working towards the outer edge.
 
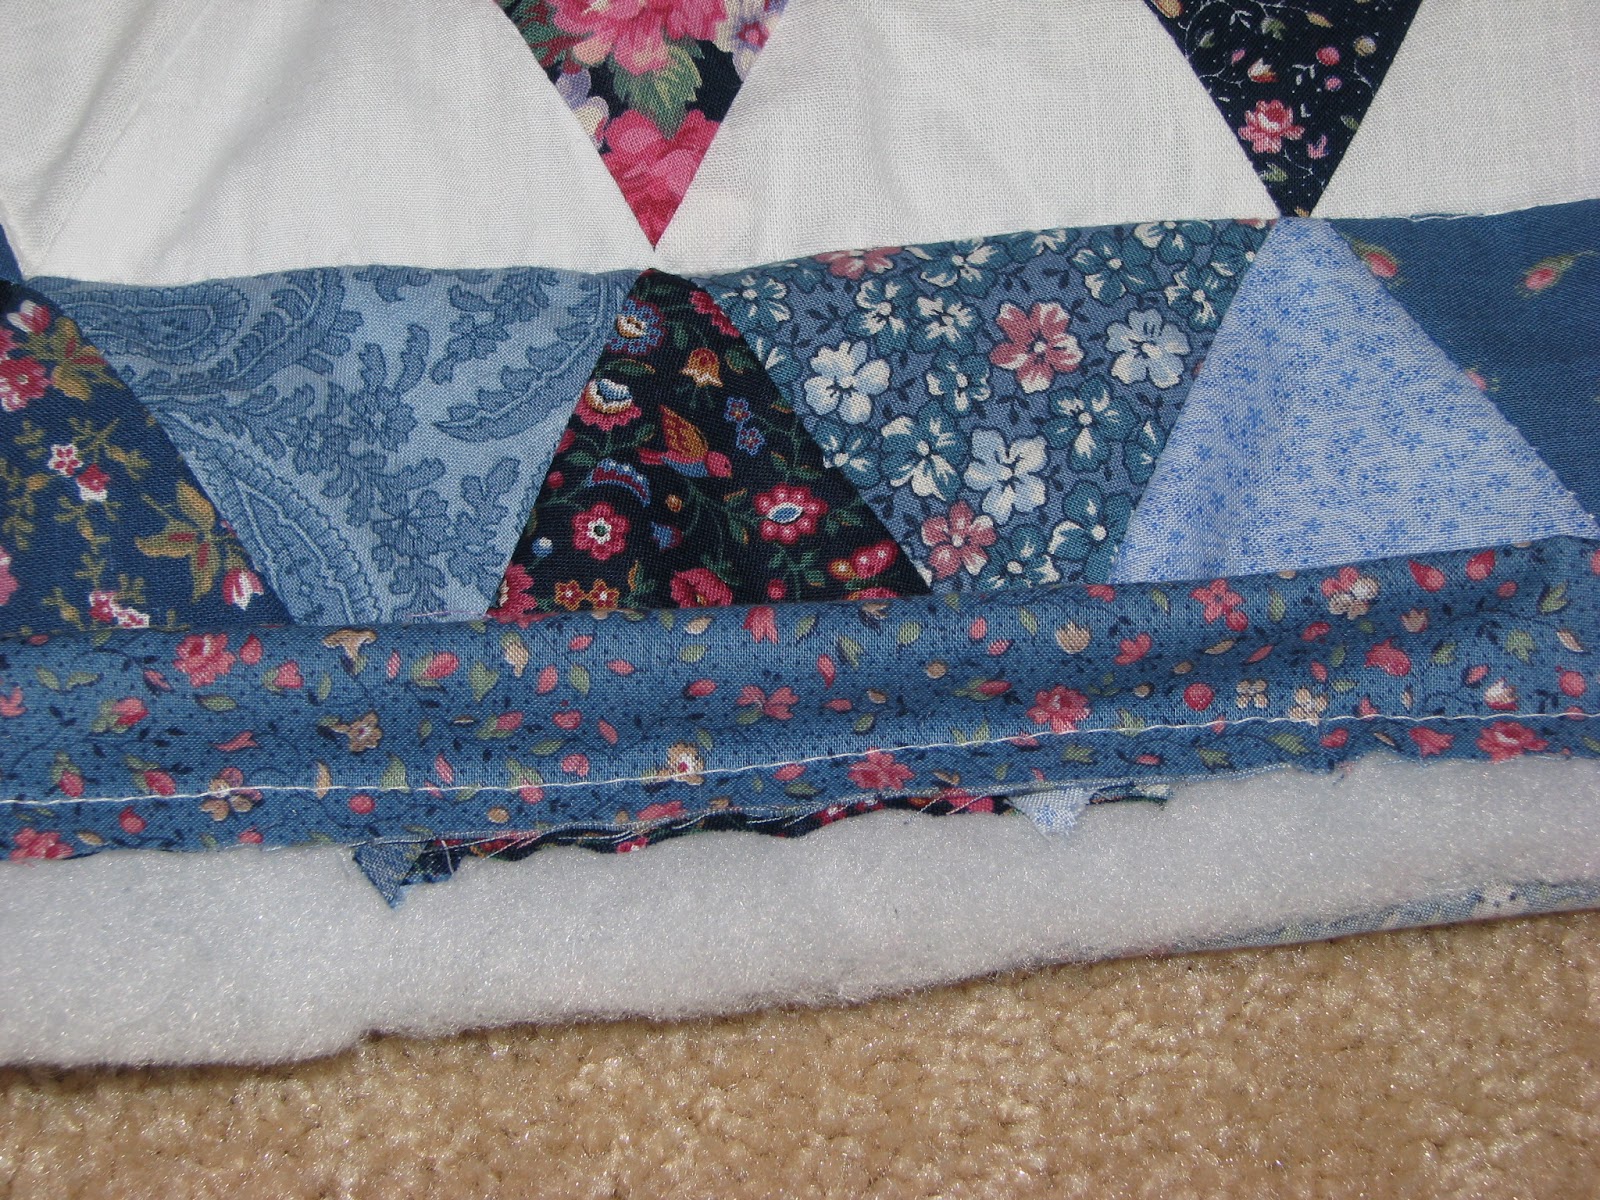
Once you have the layers sewn together, attach the bias strip that you prepared earlier.  Trim excess batting and back fabric.  Fold over bias strip and attach by hand stitching to back side of topper.

If you want your topper bigger, just add another row or two to your "slice".  After I finished, thought it would be neat to attach more hexagons to make a large quilt for the bed or to wrap up in with a good book.  May have to attempt that at a later date.  Did have enough fabric to make two for the bazaar.  Enjoy!


Wednesday, May 16, 2012

2L Flowergirl Basket

 
A daughter of a co-worker is getting married and needed flowergirl baskets and couldn't find something they liked or within their budget.  This did the trick.  We made 2 baskets for less than $12.  

 These are so easy and can be made without a stitch if you prefer.  If not sewing it, where the directions say to sew just fold raw edge of fabric over to hide it.  Using fabric glue or hot glue hold seam into place.  You will need a 2L bottle, approx 12" x 18" batting, and approx 3/4 yard fabric of your choice for each basket.

The first time I made this type basket was 24 yrs ago.  Don't remember where the original pattern came from.  Have made these out of satin, cotton, cotton blend, and netting.  Have sewed these and have used a non-sew technique; both with success. 

2L soda/pop bottle washed and dry. Measure approx 4.5" from bottom of bottle and cut with utility knife. Cut a handle approx 1" wide. Toss the top portion of bottle or use it as a funnel.


Cut a 14" x 7" rectangle of fabric.  Sew short seam right sides together.  Fold over basket like a cuff and hot glue/fabric glue into place. Cut a 4" circle out of batting and out of cardboard (I used an old cereal box).  Glue batting circle to cardboard.  Cut a 6" square/circle of fabric.  Glue fabric to back side of cardboard.
Place circle inside bottle basket.

Cut fabric 12" x 2.75" for handle.  Sew right sides together at long edge.  Right side out.  Place plastic handle inside fabric sleeve.  Glue into place.  (Hold handle into place with clothes pins until drys)

 Cut two 15" diameter circles keeping wrong sides together (I use my pinking shears for this for a prettier finish, but a straight scissor works great too). Sew or glue approx 1.75 yards of lace  between layers of fabric.    Cut a 10" circle of batting.  Place batting on top of fabric circle.  You could sandwich batting between layers too.  Not sure why I didn't but afterwards I attached the lace it was too late.

With a rubberband, hold all layers together.  Adjust fabric circle as needed.
Cut 4.5 yards of ribbon your choice of width into 3 equal lengths.  Attach to basket with a nice bow.  Carefully attach ribbon with glue.  Embellish any way you would like. 

Enjoy!

This could be transformed into a graduation, Easter, house warming, etc. gift basket. 
 Just fill with trickets and goodies. 


.

Monday, April 30, 2012

Reversible Pillowcase Book Bag

This is the fastest and cheapest reversible bag I've ever made.  Found pillowcases at a local store selling for $1 a pair.  Creative juices in tow; I thought of a book bag would be great for these.


1.  Take 2 pillowcases either the same print or mix and match.  This bag is reversible so have fun with it. 
I played around with the curve and length of the handle.  Personal preference.  Have fun with it. 
2.  Fold pillowcases in 1/2.  Cut to preference.  Open. 
3.  Using 1/2" seams and right sides together, stitch curved edges together.  Leave open at handle. 
4.  Right side out. 

5.  This is a little tricky, but it works.   With right sides together at handle stich top of handle.
6.  With wrong sides together stitch along seams to reinforce. 

Your bag is complete. 
  
Enjoy!

Saturday, April 28, 2012

Paper Box Making

I've been making these boxes for years out of discontinued wallpaper sample books and wrapping paper scraps, but you can use any type of paper or cardstock you choose.  Not sure where this pattern first originated, but a woman from church who taught GEMS gave me the pattern.

This box finished size is approx. 4" x 4" x 2".  I started with two 12" square papers.

What you will need:  ruler, pencil, scissors and 2  square papers of your choice, tape/glue optional.

1.  With your ruler draw a diagnal line from opposite corners on the backside of the paper.  You now have an X drawn on the backside.

2.  Fold corners meeting at center of X as shown.
 3.  Fold straight edges meeting at center.  Open as shown below.
 4.  Cut  on fold line to next fold line.  Look at below picture.  There will be four cut marks.

 5.  Fold open as shown below.
6.  Fold in corner at fold line.  Flap from above will hold it together when you fold it over.

 7.  If desired, tape or glue to secure.
8.  Do the same for the bottom of box.  However, trim the bottom box 1/4" smaller to start.
9.  Embellish with ribbons and/or anyother items you would like. 

It takes me longer to embellish it than making the box.


Wednesday, April 4, 2012

Wristlet Bag

This small bag was used from my scraps.  Can't let those scraps pass by. Only had to buy a zipper (and bought that 1/2 off). 

Found this pattern in Quilts and More issue Spring 2011
Like most things I've crafted, I don't always follow the directions to the letter and make it my own, however the insertion of the zipper was a new way for me.  I liked it.

You could patchwork it like this one or use a 2 pieces of 6.5" x 9.5" of fabric.

What you will need: 
Scraps of fabric to make 2 - 6.5" x 9.5" rectangles for the outside of the bag.
2 - 6.5" x 9.5" rectangles for the liner.
2 - 6.5 x 9.5" rectangles of heaveyweight interfacing (sew in or fusible both work fine).
10" zipper
2.5" x 12" fabric for handle or use 1/2" x 12" piece of single fold bias tape. 
Quicker yet; use a 12" piece of ribbon.  (I used my scraps)

Directions:
If making yours from a solid piece of fabric or if you have patchworked fabric together to form a new piece of fabric meausing 6.5" x 9.5".  Using a small plate of mug as your template; round the bottom edges.
 
Following picture above, make a small pleat at the rounded edges of liner, interfacing, and outside fabrics.

Either sew your interfgacing to the liner or iron it into place.

For handle:  If you have used bias tape, just sew the long side together closed.  If you are making yours out of scraps, make it into a bias piece of fabric by ironing it in half and then folding the edges into the middle seam.  Iron together and sew long seam together.

Place handle approx. 1.5" from top edge of one of the outside rectangles of fabric.  Tack into place.

Adding a the zipper; sandwich the closed zipper between the lining and outside fabrics (fabrics righ sides facing together).  Pin to hold all 3 items together.  Using a zipper foot sew using a .25" seam.  Do this again to form the other side of the bag.

With outside fabrics facing up and zipper in place, Topstitch 1/8" from zipper.  This will keep zipper from getting stuck into the fabric while in use.

Open zipper approx 1/2 way.  With right sides together layer bag outside fabric and lining pinning edges.  Sew along outside edges.  Reinforcing zipper.  Clip excess zipper if needed.  Leave enough of an openting at the bottom for turning.  Don't forget not to sew the handle.  It should be tucked inside for this step. 

Turn right side out.  Stitch lining closed. 

You now have a cute little Wristlet.