Thursday, October 25, 2012

Jean Purse


Couldn't let the jeans just sit there, after shortening jeans into shorts/bermudas.  With the church bazaar around the corner, thought of some little purses.  I still have some jean left over and planning something with those in the near future. 
 

Directions:  1.  From bottom of jean measure 8" and cut. 
                  2.  Lay cuff over scrap fabric folded in half.  Cutting on fold; cut 1/4 larger
                       than jean (this is to give fabric for seam allowance.  The bottom of your 
                       fabric is the folded end. 
                
 
3.  Stitch sides of lining using 1/4" seam allowances.

4. Cut 1" square out of bottom as shown below out of lining and jeans. This will form a
    base for the purse.


5.  Fold cut edge together shown in below picture and stitch using 1/4" seam allowance. 
     Do same for lining.
6.  Right side jean and insert liner so wrong sides are together.

 
7. Cut two 2 3/4" X 13" of scrap fabric.  Sew along long side with right sides together. 
    Inside right.  These will be the handles.
8.  Place handles and tack into place.
9.  Make sure liner is snug to bottom of purse.  With raw edges of liner carefully fold them
     and stitch into place.
10. Embelish as desire.
 
This makes cute little bags with free items around the house.  The button flower was a piece of fabric sewn like the handles, however bunching the fabric and secured with a button. 
 
Enjoy and keep sewing. 

Tuesday, October 23, 2012

Jeans Get New Life


This is such a simple technique.  As you can see my the picture, my daughter has plenty of room in the waist.  You just have to love elastic and button waists.  Wish we would have had this when I was a kid.  To find waist and length to actually fit can be so difficult and trying of ones patience. 
 
1.  Had daughter try on her pants so she could tell me how long her shorts should be.  Then I snipped a little so I could do the actually cutting on my cutting mat.
2.  After cutting, run a zigzag stitch at the bottom edge.  (If I owned a serger, this would be a great place to use it.)
3.  Cuff the end to finish.  Iron with some spray starch.  Tack into place.
 
She is thrilled to have a few new shorts and it didn't cost me anything.  Altered these in less than 10 minutes.  This time she wanted the hem cuffed.  I've done this in the past with a ribbon trim and it looks adorable.  In fact, we saw a pair of bermuda shorts just like them with the ribbon trim for $40 in a store window.  My daughter was impressed; knowing we spent $2.75 on 2" wide ribbon.


Wednesday, October 17, 2012

Table Topper


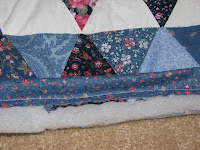
Thought I had used up all my blue scraps, but apparently they breed.  Found more as I looked for scraps for sewing items for our church bazaar.   I have never sewn triangles before, so thought this would be fun to try and another way to use up scraps.  Don't look to close, my points aren't great, but not bad for the first attempt. 
 
This table topper measures 22" finished.
 
First cut strips of fabric 3" lengths.  Then using a ruler or make your own template and make triangles. You will need 24 light colored triangles and 72 dark colored triangles (or if you choose just cut total of 96 triangles and arrange any way you prefer). 


Cut 2.25" strip of fabric approx 90" long to form bias edge.  Fold and press bias strip in half.  Attach when ready to finish edge of topper.

Ok, wasn't thinking when I started sewing to take a picture before piecing it all together, but then I didn't have a pattern and just started sewing triangles.


Think of the triangles as a slice of pizza.  Center has 6 individual triangles, but you first lay 1 down.  Sew a row of 3 triangles, row of 5 triangles and  a row of 7 triangles together.   Now sew your "slice" matching seams.  You will make 6 "slices".  Take 3 of the "slices" and matching seam sew them together.  You will end up with 2 sections.  Again matching seams, sew the 2 sections together to form a hexagon. 

Layer 3/4 yard fabric for backing, batting, and top.  Hold all layers in place with safety pins. 
You can get as fancy with your stitching as you would like, however, I can barely quilt so I stitch in the ditch.  You can stitch the top any way you choose.  Be creative start in in the center working towards the outer edge.
 
Once you have the layers sewn together, attach the bias strip that you prepared earlier.  Trim excess batting and back fabric.  Fold over bias strip and attach by hand stitching to back side of topper.

If you want your topper bigger, just add another row or two to your "slice".  After I finished, thought it would be neat to attach more hexagons to make a large quilt for the bed or to wrap up in with a good book.  May have to attempt that at a later date.  Did have enough fabric to make two for the bazaar.  Enjoy!